
Work with AutoCAD Plant 3D Data in One Table
Load P&ID or 3D Piping rows, choose the classes and fields you need, make controlled edits, review every pending change, and exchange selected data with Excel.
What does Data Manager do?
Data Manager gives you a project data table that is easier to search, filter, compare, and edit than the regular Plant 3D palettes. It works with P&ID and 3D Piping data already registered in the active project.
Current drawing or full project
Search and views
or import Excel
each pending change
Edits are staged first
Typing in an editable cell or importing an Excel file creates a pending change. Nothing is applied until you choose Accept. Use Discard to remove pending changes, or Review changes to inspect and exclude individual ones.
Have this ready

The drawing and project data must be available to the Plant 3D session.

Start with one family/class and one or two fields so the first result is easy to verify.

Plant 3D controls which properties can be changed. Grey or unavailable cells cannot be edited here.

Use a copy for the first bulk-edit or Excel-import test.
Load the right rows, then narrow the table
Open Data Manager and choose the data scope
Open the Data Manager panel from RKCadTools, or type P3DDATAMANAGER (short form P3DDM).
- Choose P&ID or 3D Piping under Project part.
- Choose Current drawing when working in one drawing, or Full project to include the project-wide rows.
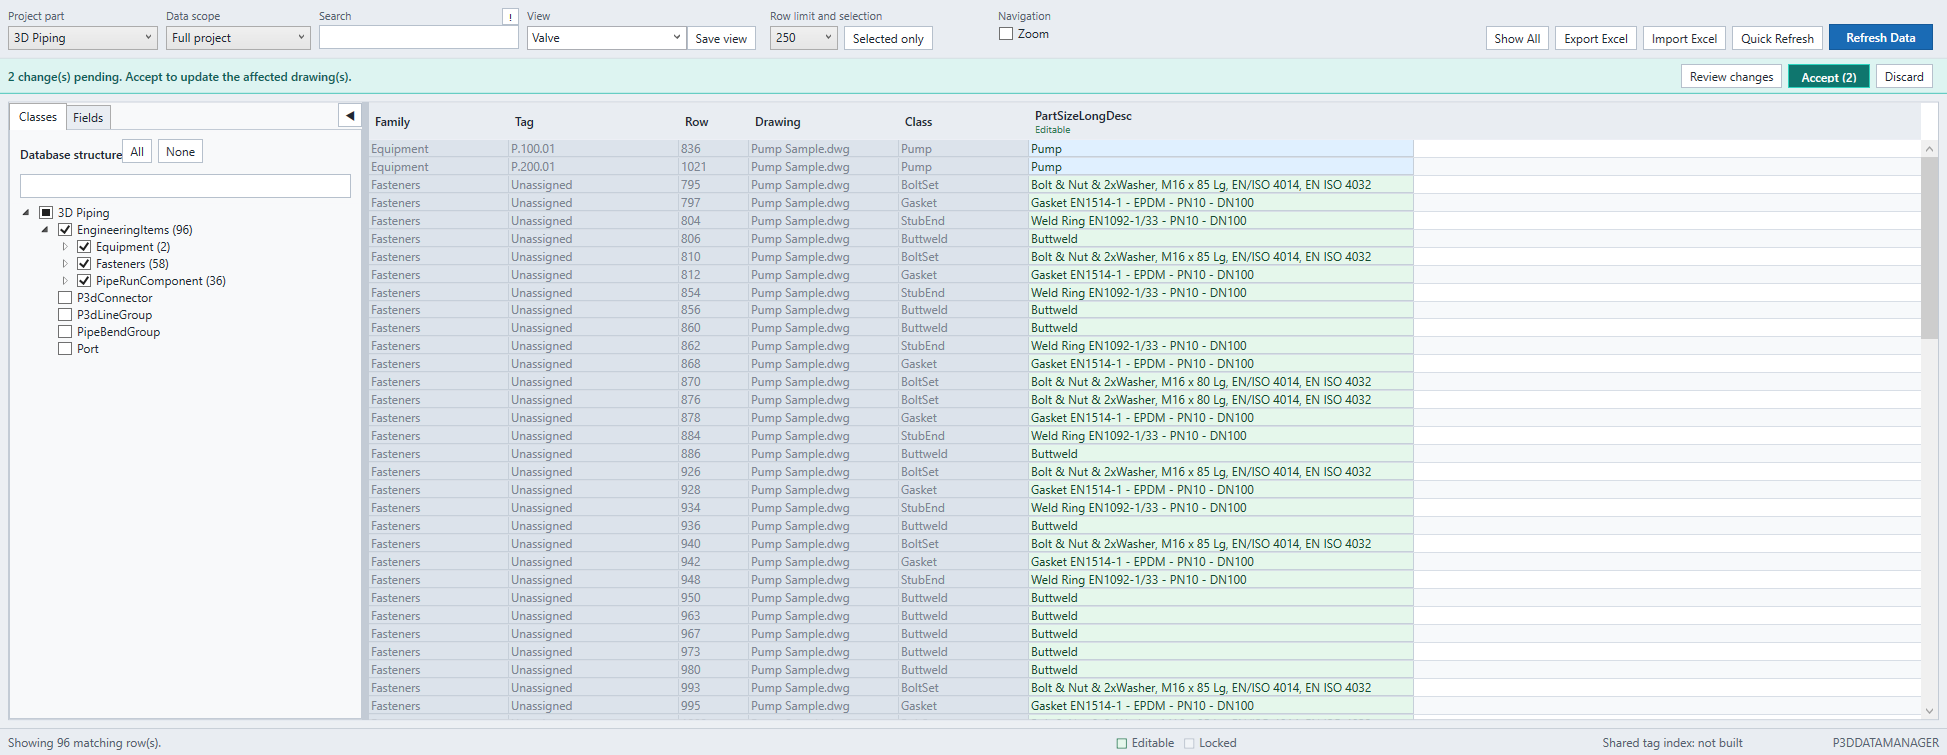
- Use the Classes tab to select the classes to load. A parent selection includes its checked child classes.
- Click Refresh Data to load the selection.
Show only the fields you need
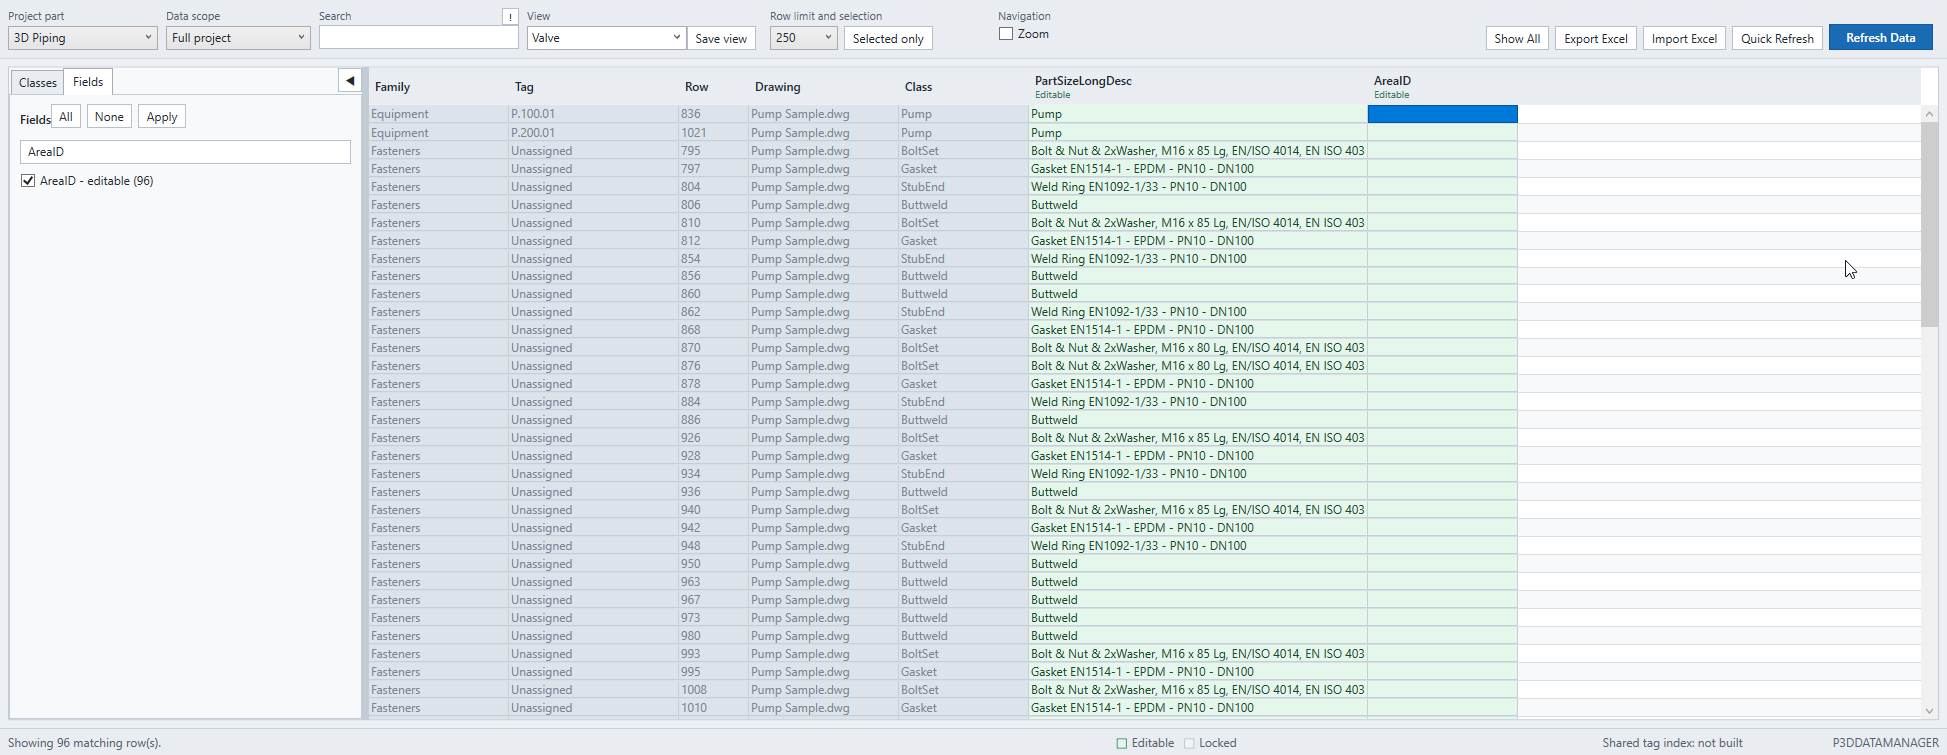
- Open the Fields tab.
- Use the field search box to find a property, such as
AreaID. - Tick the fields you want to display, then click Apply.
- Use the column headers, search box, and class filter to focus on the rows that matter.
Save a view for a repeatable task
- Set the project part, scope, classes, visible fields, search/filter, and column layout you need.
- Enter a name under View, then click Save view.
- Choose the saved view later to restore the same working layout.
Useful first views: one view per discipline or purpose, such as “Valves — 3D Piping”, “Equipment tags — P&ID”, or “AreaID cleanup”.
Edit, review, and apply with confidence
Edit only green cells
- Click an editable green cell and enter the new value.
- Pending changes are shown in the grid and counted in the status bar.
- Use Review changes to search the pending changes and exclude any item you do not want to apply.
- Click Accept to apply the remaining changes, or Discard to remove them.
Confirm the result and save the affected drawings
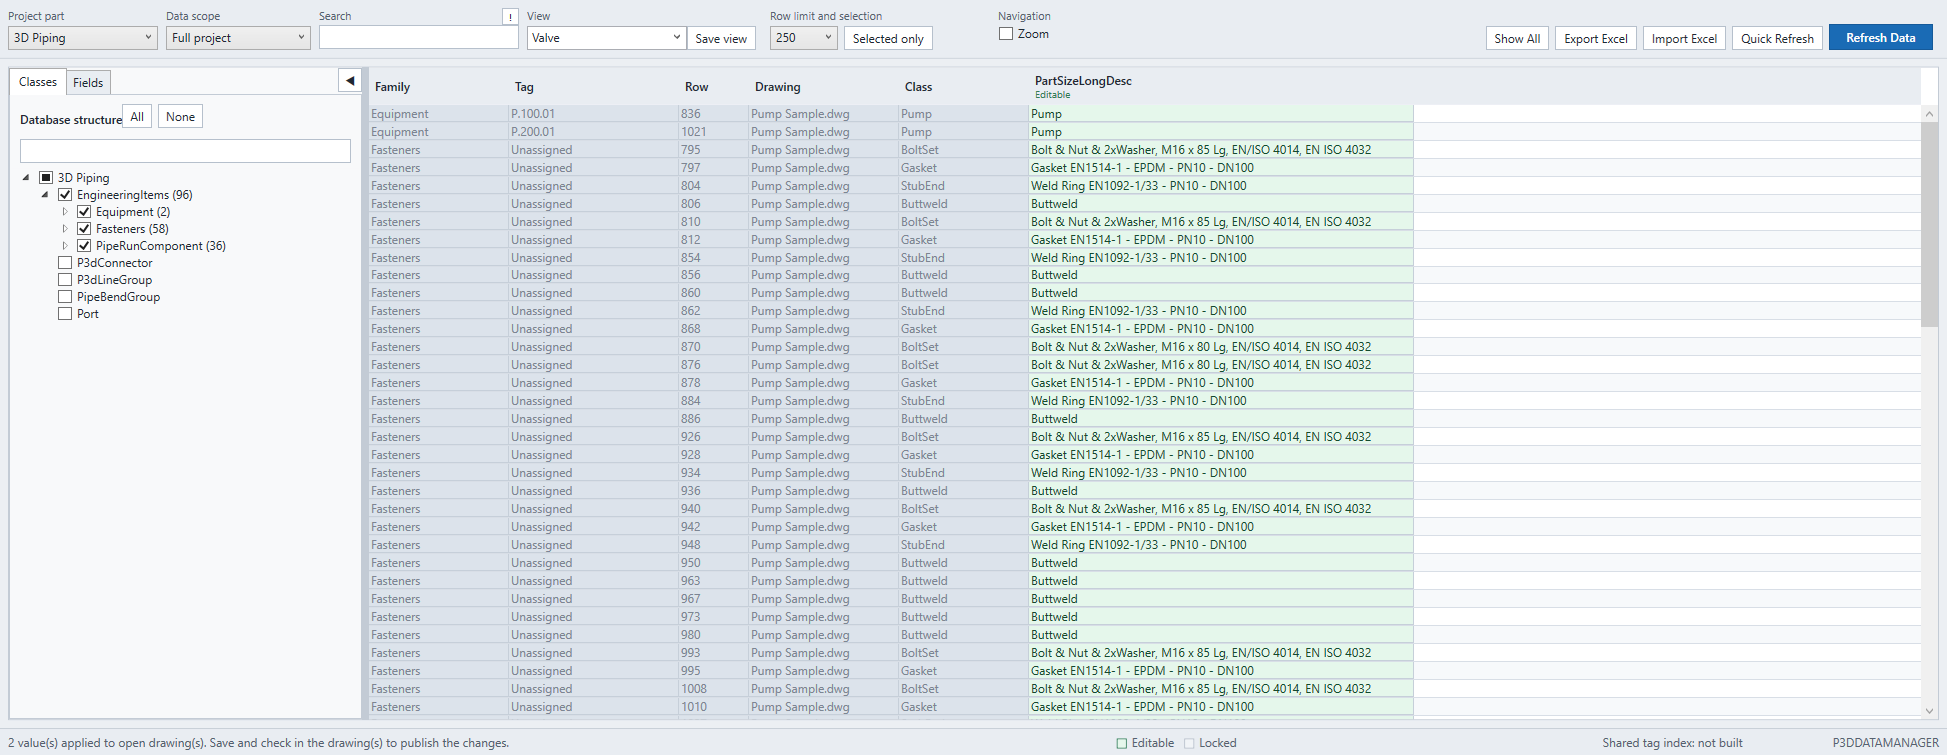
After accepting, Data Manager reports that values have been applied to the affected open drawings. Save and check those drawings through the normal Plant 3D workflow to publish the changes.
| Cell appearance | Meaning | What to do |
|---|---|---|
| Green | Editable property | Edit it directly; then review and accept. |
| Grey | Locked property | It cannot be changed through this grid. |
| Dark grey | Not available for this row | The selected class does not provide that property. |
| Yellow Tag cell | Tag-controlled field | Use the Plant 3D tag command; double-click the cell to start it. |
Exchange the visible data with Excel
- Filter the grid and choose the fields you want to work with.
- Click Export Excel. The workbook includes a hidden stable object key used to match rows safely on import.
- Edit only the unlocked cells, then click Import Excel.
- Use Review changes before accepting the imported values.
- After accepting, inspect the generated
.import-result.xlsxfile. It records applied, skipped, unsafe, or unmatched rows.
Do not alter the hidden key or row identity
Keep the exported workbook structure intact. Data Manager uses its stable hidden key to identify the correct Plant 3D object when importing.
Quick troubleshooting
The grid is empty
Confirm that the correct project part and data scope are selected, then check at least one class and click Refresh Data. A class selection changed after loading does not update the grid until you refresh.
I cannot edit a cell
Only green cells are editable. A grey cell is locked by Plant 3D or the column rule; a dark-grey cell is not available for that row. Tag fields must be edited using the Plant 3D tag command.
The table shows old values after another command changed data
Click Quick Refresh or Refresh Data to load current values again.
Selecting a row opens or zooms to a drawing
Turn off the Zoom option in the Navigation area when you want to inspect the table without navigating the drawing.
Excel import did not apply every row
Open the generated .import-result.xlsx copy. It identifies rows that could not be safely matched or changed and records the staged changes.