01
Close AutoCAD Plant 3D
Close all Plant 3D windows before installing or updating RKCadTools.
Installation guide
Install the toolkit, activate your license, and put everyday project tools within reach in the Plant 3D ribbon. No project migration required.
01
Close all Plant 3D windows before installing or updating RKCadTools.
02
In File Explorer, paste this path into the address bar to open the per-user plugin folder:
%APPDATA%\Autodesk\ApplicationPlugins\
Copy the complete RKCadTools.bundle folder here. Keep the version-specific folder name if your package uses one, such as RKCadTools2027.bundle.
Installing for all users? Your IT administrator can use C:\Program Files (x86)\Autodesk\ApplicationPlugins\ instead. Choose one installation location.
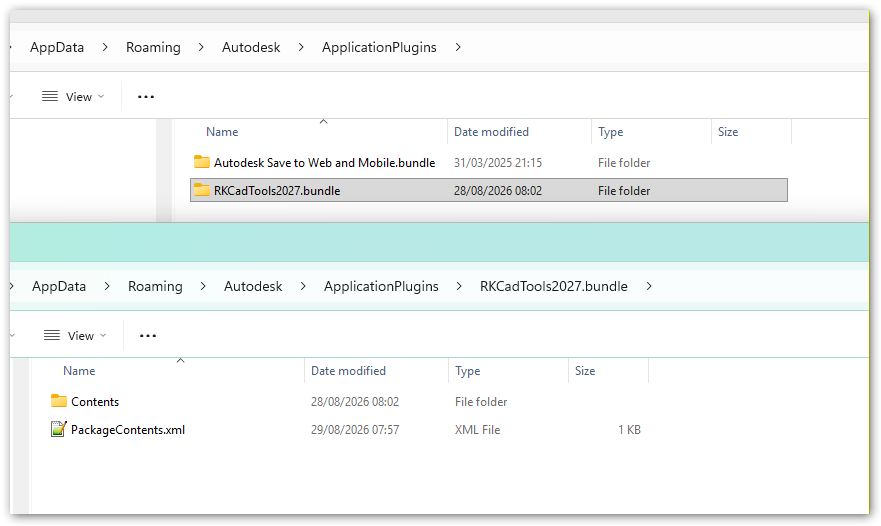
RKCadTools2027.bundle. Your bundle should contain Contents and PackageContents.xml. Select the image to view it at full size.03
Open AutoCAD Plant 3D and load a Plant 3D project. RKCadTools should load automatically during startup.
04
Look for the RKCadTools tab in the ribbon. Its tools are available directly inside Plant 3D.
05
Run an RKCadTools command to open the activation window if a license is required, or use Utilities > Activate License. Enter the key provided by RKCadTools.
The license is stored for the current Windows user. Once activated, open a tool to confirm it is ready to use.
Request a 14-day demo to try the toolkit on your own project copy. Include your Plant 3D version so we can help you get started.